Wednesday, October 2, 2013

Letter (and Number) Bread

CLB had a friend over to play with today, so CLG and I decided to bake some bread for dinner. It's always fun having some girl time, especially since CLG enjoys baking and cooking as much as I do. We picked a bread recipe out of the book, The Alpha-Bakery Children's Cookbook by Gold Medal.
This book has a recipe for each letter of the alphabet! It's a fun little book with recipes that my two Crazy Kids can make, with help from me of course! For the letter t, the book has a recipe for turtle bread, which is basically bread in the shape of a turtle. We did this when CLG was focusing on the letter T, but this week, we're actually reviewing the letters, B, C, S, and T, along with the number three. So CLG thought it would be fun to make these letters and numbers out of bread and eat them for dinner. And that's just what we did!

CLG finishing up her "C"


Here are all our letters (and our number 3)

Getting ready to take a 20 minute rest after all that work!

Rested and risen, time for the oven!

Yum! Ready for dinner!

The bread has a wonderful taste and texture, and it went beautifully with our spaghetti dinner. Even better, CLG had fun making the bread and then practicing her letter and number making skills by playing with the dough. All in all, it was a nice way to spend an afternoon!

Letter (and Number) Bread Recipe
adapted from the Gold Medal Alpha-Bakery Children's Cookbook

Ingredients
2 to 4 cups of all purpose flour
1 package of rapid rise active dry yeast
1 TBSP of sugar
1 tsp of salt
1/2 cup of water
1/3 cup of milk
1 TBSP butter

Directions

1. Mix the yeast, 1 1/2 cups of the flour, sugar, and salt in a large bowl. Put water, milk and butter in a microwavable container. Microwave it for 15 seconds, and test the temperature. If it's warm (between 125 to 130 degrees) take it out. If not, microwave for another 15 seconds. Wait for the butter to melt a bit and then add the liquid mixture to the dry mixture.

2. Stir in one egg, and then stir in enough flour so that the dough is stiff enough to handle. Sprinkle a surface with flour and then knead the dough on this for about 5 minutes, adding flour to the board as needed. Cover and let rest for 10 minutes.

3. Spray one or two cookie sheets with baking spray. Cut the bread into six evenly divided chunks, and form them into long "worms". Form the worms into whatever letters or numbers you desire. Cover and let rise for 20 minutes. While the dough is resting, preheat your oven to 350 degrees.

4. Place the cookie sheet(s) into the oven and bake the bread for 10 to 15 minutes. The bread should be a golden brown and make a hollow sound when you tap on the bottom of a piece.

Wednesday, September 25, 2013

Lunchables!

I just realized something the other night while trying to figure out what to make the Crazy Kids for dinner. You see, we generally sit down at the table all together and have a nice dinner together. But, periodically, I enjoy feeding the kids early and then have dinner set up for my husband and myself for after the Crazy Kids are in bed asleep. Something about sitting down and actually being able to pay attention to what I'm eating is just wonderful. Don't get me wrong, I like our family dinners, but it's nice to be able to eat instead of listening to the various complaints about what is sitting on this Crazy Kid's plate or whinging about whether or not the other Crazy Kid needs to eat all his/her beans or just two of them. We all need a break from that sometimes!

On days when my Crazy Kids eat separately from the grown ups, I do make a completely different meal for them. I figure if the grown ups get a treat, why not them? The only problem is that my little kid dinner repertoire is just plain sad. They get either hot dogs (yes, hot dogs! Don't get me started on what it takes to get these two to eat protein!) and a veggie, plain pasta and a veggie, or sandwiches and a veggie. They want nothing else! I tried to change it up with a quesadilla once or twice, but I probably won't be making that mistake again. And then I saw a bunch of these homemade "lunchable" ideas on Pinterest. Who knew putting food in little containers would make eating different foods appealing for little kids! I surely didn't! But my two loved the idea! Heck, CLG even helped put them together!

A quick and easy dinner for the Crazy Little Kids!

It was so easy! I just put paper cupcake liners into a plastic container and filled them up with different foods. I picked whatever I had on hand that was healthy (okay, so pepperoni and salami isn't the best, but they needed protein. Again, don't get me going on trying to get them to eat proteins!). And both kids LOVED it! Scarfed it all up! We will definitely be doing this again! So I just had to share! Go check out all the neat lunchable ideas over on Pinterest! I can't wait to try it again...ummm, yeah, tonight!


Thursday, September 19, 2013

Rice Mosaic

So we did a fun little activity to go along with the book A Grain of Rice by Helena Clare Pittman. Again, this activity is thanks to the book, Learn at Home Grade 4, which we absolutely love for our homeschool!


If you haven't read the book, it's basically about an extremely clever peasant and a princess who want to marry, but good old dad, the Emperor, is standing in the way. It's fun to see how the clever guy wins over the Emperor by starting with a simple grain of rice. CLB loved it! So he decided to do the accompanying rice mosaic craft that was suggested in Learn at Home.

First I had to dye rice different colors. It's really not that difficult, but you need a bit of space. I divided one bag of rice into 6 different baggies. Then added enough rubbing alcohol to cover the grains (just a couple of tablespoons will do, I think, but I did use more than that). Then I added drops of regular old food coloring into each bag, mixing colors until I had the entire rainbow:

The colors came out so vibrantly!
After soaking in the baggies for a bit, I just poured out the extra alcohol and laid the rice on piles of paper towel to dry. Once they dried up, I put them into clean baggies to keep them separated.

The next day, CLB decided on a picture to make. He wanted to make a tree, so used regular Elmer's glue to lay down the trunk and branches. He got a little carried away with the glue, so I suggested he use cotton swabs to move the glue about the page. As he completed each part, he would sprinkle the glue with colored rice, and then move onto the next piece. 

CLB has always said that he prefers making abstract art to real life pictures. I guess that's pretty obvious with this depiction!

Now I should warn you that gluing rice, although fun, is a bit messy, so have a broom and dustbin on standby! But CLB had a blast, and, although it's tough to see the tree because he decided to use some unusual coloring, he was really proud of the result. And that's all that matters, right!?!

Thursday, September 12, 2013

Making Butter

Today we decided to take some heavy cream and turn it into butter. All we had to do was put cream in a container and shake it, so easy peasy lemon squeezy, right? CLB did it over the summer in a science class at the library, and it didn't seem so bad, and CLG is exploring farm animals, so why not make butter?

Well, let me tell you, making butter may sound easy, but it involves a lot of shaking! Not the kids' shaking the container, mind you. Know this in advance if you decide to do this with your kids! Those excited little people are going to give up pretty fast on the shaking, and you're going to be left with the butter. And a sore arm!

Really all it is is putting an amount of heavy cream into a container that you can seal and then putting in the time to shake the container. Non-stop! For about 15 minutes or so. Which, I know, doesn't sound long, but when the Crazy Little Kids gave up after a couple of minutes, those 15 minutes I was left with  shaking the cream seemed to take forever. Oh, and did I mention about 5 seconds into my shaking, I realized I hadn't put the lid on tightly. Cream all over me and the kids. Fun! Make sure your lid actually fits your container tightly!

After we shook for a bit, the cream turned into whipped cream. At this point, I added a bit of salt to the mix and started shaking....again! I kept at it but made the kids shake at times to give my arm a rest (they actually liked to jump with the container. To be honest, that seemed to work better than my shaking!). Eventually, we noticed that a liquid had reformed back in the container. We opened it up and there it was!

Butter! Sitting in it's very own buttermilk!

We were amazed!! To be honest, I didn't think it would work. I mean, knowing that it should work and then having it actually work are two different things. Next question, how did it taste!? So we drained the butter from the buttermilk:

Really high tech, huh!

And then plopped it onto wax paper:


This was still actually pretty wet. I ended up draining more buttermilk using a paper towel and putting the butter back onto fresh wax paper.


Then the big taste test...would it taste like butter!?!

It looks good, but how does it taste?

It does! Like fresh salted butter. It's fantastic! I can't believe we did it! We wrapped it up and put it in the fridge.

All wrapped up and ready to go!

The Crazy Kids and I have every intention of eating it with dinner tonight. It's lovely! And fun! Now, I just have to work out this cramp in my arm....


Thursday, September 5, 2013

Catching Some Zzzzzs!


I'm a member of a local mom's group, as I'm sure a lot of moms are. The group communicates by email and all us moms share deals around town, where to find the best plumber, contractor, dentist, pediatrician, etc. and offer advice to other moms who are trying to figure out a particular mom problem. One of the issues that tends to come up almost cyclically (probably at least four times a year) is how to get a three year old to go to sleep in his/her own bed. Since we just worked our way through this with CLG, I decided to reply (well, actually I decided to reply after one mom suggested massages and another melatonin...for the kid, not the mom!!), and realized, hey, this is a pretty good blog post! And so here it is:


Ahhh, getting a three year old to go to sleep. We've just worked our way through this, too, with our youngest one. Three year olds are great draggers of feet! LOL! Both mine stopped napping around 3, so that did make my life easier. But they do like to push their limits with the bedtime routine. We stuck closely to our routine, and if the kids tried to stray, we'd gently put them back on course. We are strong proponents of the 5 Bs: Bath, Brush, Bathroom, Book, Bed. We give plenty of time to get it done, no rushing through this, but everyone stays focused on the task at hand. We do not generally clean up the toys and such before, during or after this routine. Cleaning up toys happens before dinner, we eat dinner, and then, depending on the bedtime of the child, we start the bed time routine (our son is older now, so he doesn't go to bed quite as early any more, but we still only allow quiet reading/drawing before bed usually). We stick closely to our routine, and if the kids try to stray, we gently put them back on course. "I need a drink of water" doesn't stop the routine, because we either tell the kids they'll have a drink when they brush their teeth, or we remind them that they just had a drink when they brushed. That kind of thing. We do sometimes have issues with teeth brushing, though, and then we get a bit firmer. If a child is refusing to brush his/her teeth, we explain that he/she either can get the teeth taken care of or there will be no book. This generally does the trick, but only because when it didn't do the trick, we took the book away. It doesn't matter how much they scream, if the teeth don't get brushed (or there's any sort of outright refusal to get the routine done), the child doesn't get a book. It makes for a louder (ie the kid is screaming and crying) bedtime, but we figured out a way to deal with that too (see below).


Once the child is in bed, he/she says prayers, gets kisses and hugs and maybe a little song, and that's it. Any other discussion can be done during the bath and brushing parts of the program (we like to discuss what we did that day and what we're doing the next day). If one of the kids acts up and is out of bed or screaming, there's a routine for that too. The first time I get up right away and remind him/her it's bedtime. Pick him/her up and tuck him back into bed. No kissing, no hugging, no talking beyond saying it's time for bed. Second time around, he/she gets no conversation at all, just gets put back in bed. And that continues until he/she stays in bed. And believe me, there's been many a night where I just sat on the floor by the door for a half hour to an hour until the kid stays in bed! But they learn that bed is the place to be and where they're going to end up regardless of whatever wandering they would like to do!
It's called a bed! You sleep in it!
If there's any yelling, screaming, asking questions (of any sort...don't fall for the "Could you get me a drink of water?" play...that seems to be a specialty of three year olds!), anything like that, again, I go up right away and remind the child it's time for bed and tuck him/her back in. Nothing else, no yelling, no other talking, no hugging no kissing! If he/she continues to scream and/or ask for stuff, I just go out of the room and wait 5 minutes or so, then I go back in and try again to tuck him/her back in. If it works, great, if it doesn't back out again for another 10 minutes this time. Keep increasing the time in between by 5 minutes or so. Sometimes, they just are so tired that they need to yell, I think. But make sure to go in there when they settle down and tuck them in...I think they also need that tucking in and face wiping to really settle in.

And if you don't want the child in the bed with you any more, for goodness sake don't let him/her sleep in your bed any more!! If the child gets up in the middle of the night and wants to get into bed with you, remind him/her about his/her own bed, lead the child back to the bed, and tuck him/her in. No hugs, no kisses, just a reminder about his/her own bed. If he/she gets out and comes back in, just bring him/her back, no talking this time, and tuck him/her in. And repeat, repeat, repeat. If there's any screaming, crying, or yelling involved, but they're staying in bed, great! Just see above to see how we dealt with screaming and crying. It's tough on you the first few times, but if you let the child back into your bed, it'll be 20 times harder the next time because he/she will try longer to see if you give in. Believe me, I know with this one...my husband always let my youngest into bed, which worked fine for him because she stopped bugging us, but was not fine for me because she basically shoved me out of bed. I like my snuggles, but not at 2 am when I need my sleep!


As far as monsters and bad dreams go, the only things that have worked for us is a bit of imagination. These things are coming from their imagination, so we figured we'd fight the monsters with our imagination :). I made monster spray (just water and glitter), which I would spray around the room whenever that worry came up. Monster spray works for at least a week and is guaranteed to keep all monsters away for at least that long (after I spray it, I always ask if I missed any spots). Bad dreams are a tough one, though. I do give lots of hugs and kisses after a bad dream, but at one point it was so bad that my son was waking up constantly and working his way into not wanting to go to sleep at all. In a fit of desperation, I grabbed this tiny stuffed dog and frantically yelled out, "This is Good Dream Doggie!! When he's with you, you don't have any bad dreams!". My son stopped crying, rolled over and went to sleep without bad dreams. I was shocked...but it worked for us!

Thank Heavens for little doggies!

Oh, and if there's a really bad thunderstorm that wakes the kids up, all bets are off...both kids usually end up in bed with us getting loads of hugs, kisses, and whatever else they need. But you can bet the next night they're back in their own beds!!


Tuesday, September 3, 2013

Bake While You Spell!

A few months ago,  CLG  figured out how to sound out simple words and spell them. Since then, she seems to be asking how to spell different words, non-stop. We're talking every day, all day, with every breath she takes! I had a couple of days there when it seemed we had moved past this phase, but she came back to it after a bit of a break. Don't get me wrong, I think it's great that she is curious about spelling and sounding out words, which is why I answer her questions each time she asks. But after months (and months!) of spelling words, I think even the most patient person in the world would start to twitch a bit!

To try to shake things up, I thought we'd mix in some baking with all this spelling. If there's one thing the CLG likes more than spelling, it's baking! So both Crazy Kids and I made up some sugar cookie dough (Thank you, Pioneer Woman for the dough recipe!), rolled it up in wax paper into two tubes, and then put it in the fridge over night. The next morning, I baked the cookies up into little rounds and frosted them (again, thanks Pioneer Woman!!!) in different colors. Then the CLG went to spelling some words. As she spelled them, I wrote the letters on the cookies in melted chocolate. We went through a number of -at words, and then moved on to -ogs.

Frog, log, hog, bog....Thank goodness I get to eat cookies after all this spelling!!

CLG had great fun, and CLB is happy to have lots of cookies to eat. All in all, a successful spelling lesson!

Friday, August 30, 2013

Cool Science Experiment!!

For science, CLB has been exploring force and motion. He's read about Sir Isaac Newton a bit, and watched a short biography about him on biography.com. But reading and watching about force and motion only goes so far. I wanted to show CLB how this all fit together. I was absolutely delighted when I found this experiment on the blog, ordinary life magic. Although the potential for mess was high, we just couldn't pass it up!

The idea behind this experiment involves Newton's First Law of Motion...an object at rest will stay at rest unless acted upon by an outside force. CLB knows these words, but he hasn't seen them in action! First, I set up the experiment, without telling him what we were doing. I was going for the WOW factor here, and man, does this experiment have a lot of WOW. So here's the set up:

The potential for mess here is HUGE!!!

Yes, that is a RAW egg perched on top of a small paper tube, on top of a tin pie plate, on top of a glass of water! And guess what I did? I knocked the pan away with a mighty karate chop! POW! Before I did that, I asked CLB what he thought would happen. His hypothesis was that there would be a mighty mess to go along with the mighty karate chop! But what actually happened was:

YEEESSS!

The egg fell straight down into the water, which broke it's fall so it didn't break!!! I have to admit, I was a nervous wreck doing this. I really wanted it to work, but I wasn't so sure about my karate chop capabilities! This experiment works because the karate chop knocks over the pie plate and the lip of the plate hits the paper tube, knocking it over in turn. However the egg hasn't been knocked over (acted upon) by either my hand, the pie plate, or the paper tube. Since there isn't a force acting on it except gravity, it falls straight down to the water. 

You should note that you absolutely have to line the paper tube up with the opening to the glass so that the egg falls into the glass and not on the counter. And you need to make sure to hit only the pie plate with your karate chop. If you hit the glass and the pie plate you do end up with a mess, as CLB found out when he tried it:
Egg down! Egg down! Actually, the egg did crack but not too badly. Cleaning up the water was more of a pain than the egg!

If I were you, I would definitely give this one a try! Hey, what's a bit of mess compared to showing your kids how cool you and science are!?! But, just in case you're worried about it and just can't bring yourself to try it, CLB took some video of our third attempt of this. It's a bit shaky (he is only 8, so his videotaping skills need a bit of work), but in 45 seconds you can see exactly what happens and how exciting it all is to Crazy Little Kids!


Saturday, August 24, 2013

Spelling City!

Just a quick shout out: SpellingCity.com is offering a free 30 day premium membership sign up for new members until August 31st. I've used SpellingCity, the free version, for the last couple of years and loved it, but never thought to pay the $30 a year for the premium version. Since we started playing around with the premium membership, I've been able to see all the games that CLB can play to help his spelling. And I can group the lists how I want and set up assignments for CLB to do on his own by a certain date. We're loving it! I'm not affiliated with the site at all, just a happy homeschooling mommy who can't believe she didn't try this out earlier!

To get the free 30 day trial, just go to SpellingCity.com by August 31st, click the "Sign Me Up" button and enter the code BTS13 at checkout. Easy peasy lemon squeezy!

Thursday, August 22, 2013

Circles and Faces!

Just a quick little post from little old me! Just about done wrapping up the first week of school, and I wanted to share these cute little snacks we made this week. CLG has been making an "All About Me" book, and one of the first things she did was to look at different faces and then try to draw her own face.

Give her a break...she's only just about 4!
Handout is from the book Learn at Home Grade K

She's been having great fun putting all of this together, and the activities have been right up her alley (Love love love the Learn at Home series!) Our favorite one this week, though, was making a snack that looked like her face. We started with a rice cake:

And lookie there...it's a circle! This led to a completely different conversation linking to our study of circles this week!

I gave her a choice of jam or peanut butter to put on the rice cake to help glue the face on. She chose jam, so I spread that on for her:

Looking yummy!

For the eyes and nose, CLG added yogurt covered raisins:

Cute as a button!

Then an apple slice for the smile and grapes for the ears:


Yes, I know, her "ears" are actually cheeks. Again, she's not quite four!!

CLG loved making her circle face snack almost as much as she enjoyed eating it! Oh, and CLB just couldn't resist making one either:

Now, him, he's in 3rd grade...I gave him grief about the "ears" a bit :)

This snack was adapted from an activity in the book, Learn at Home Grade K, published by American Education Publishing


Wednesday, August 21, 2013

Peanut Butter Fudge

We've completed our third day of school and all is well in our world, so I thought, "Dag nabbit, we worked our tails off and did a great job! We deserve a treat!" Since our State Fair starts up tomorrow, I also thought about all the yummy treats I'll be eating there. One of my favorites is the fudge from the dairy building...mmmm! Yum yum! That seemed to be my second good thought of the day, so I decided to whip up a batch of Peanut Butter Fudge. It's a super easy recipe, adapted from one of Alton Brown's, and it is the sole reason I still buy peanut butter in the big 40 oz containers. Two at a time!

NOTE: I don't generally cook this up with the Crazy Kids. It requires the use of one glass bowl, heated up in the microwave for 4 minutes. Since the bowl gets really hot, the Crazy Kids just get to sit back and watch while I put this together.

First, make sure you use a large glass bowl for this. The ingredients are going to expand in the microwave, so you need room for that. In the glass bowl, put in a cup of salted butter (2 sticks) and one cup of peanut butter. Then add another big wallop of that peanut butter! Seriously, you can't go wrong...just do it!

You know this can't be good for you! But who cares today!?!
Put the bowl in the microwave and nuke it for two minutes. Then take it out and stir with a wooden spoon.

You'll notice I barely take this out of the microwave. The bowl is already starting to get super hot, and I keep it here away from the Crazy Kids.

Back in to the microwave it all goes for another 2 minutes. The mixture will expand this go around, so cross your fingers that you picked the correct bowl size!!
  
It had me worried there for a minute!

Take this mixture out of the microwave (carefully! Use oven mitts and put it on a pot holder! It's hot!), and stir in one teaspoon of vanilla.

Mmm, don't forget to smell the vanilla!

Then, a cup at a time, mix in the powdered sugar. The amount of sugar you end up putting in is going to depend on how much peanut butter you ended up adding, so add your sugar a cup at a time. Again, remember to mix with that wooden spoon!

This is the first cup

This is after the third cup. The mixture is starting to get some body to it.
Once the mixture starts thickening up, add the sugar in only about a third of a cup at a time. Once it starts pulling away from the bowl after you mix it, you've added enough.

Perfect!

Plop it in a buttered 8x8 glass pan and refrigerate until cool.

Mmmmm!

You might want to leave just a bit in the bowl to tide you over until the fudge is cooled down! 
Nom! No one will miss this little bit...go on! Indulge!

Seriously, this is one of the simplest recipes I know that satisfies my sweet tooth! And the actual work time on it is less than 10 minutes! Who can resist!?! Certainly not me!

Recipe:

Quick and Easy Peanut Butter Fudge
adapted from a recipe by Alton Brown

Ingredients:

1 cup salted butter (2 sticks) and a bit more to grease the pan
1 cup peanut butter, with more added for good measure
1 tsp. vanilla
3-5 cups powdered sugar

Add the butter and peanut butter to a large glass bowl and microwave for 2 minutes. Take the bowl out of the microwave, stir with a wooden spoon until combined, and then microwave again for another 2 minutes. Take the bowl out of the microwave with pot holders and place on a pot holder. Add the vanilla and stir with a wooden spoon. Add powdered sugar, one cup at a time, and stir (again, use that trusty wooden spoon!). When the mixture starts thickening up, stir in powdered sugar about 1/3 of a cup at a time. When the mixture starts pulling away from the side of the bowl while you're stirring it, you've added enough sugar. Pour the mixture into a buttered 8x8 glass pan, and refrigerate until cool. Cut into bite size pieces and enjoy!!


Monday, August 19, 2013

First Day of "Home" School Traditions

So today was our first official day of homeschooling for the 2013-14 school year! Yay! The Crazy Kids were excited, I was excited, the entire house was excited! I figure everyone has different ways to celebrate the first day of school, so I thought I'd share some of ours.

The big one for me is that the first day of school is just for us. We don't plan on meeting up with friends at the park or attending any kind of group activities. Don't get me wrong...I sooooo do not have the "stay at home, don't socialize" kind of Crazy Kids! We have a very vibrant social life, with many different activities and friends to share them with. But on the first day, I want to let the Crazy Kids ease into school, not dart through lessons and then yell, "Hey, come on, it's time to go play with friends!", or, "It's such and such a day, time to go to (fill in the blank...it could be anything from the Y to a playdate to a co-op class!)." Nope, slow and steady on the first day! It helps us enjoy the day and each other, and always reminds me how lucky I am to be with my kids all day and able to homeschool them.

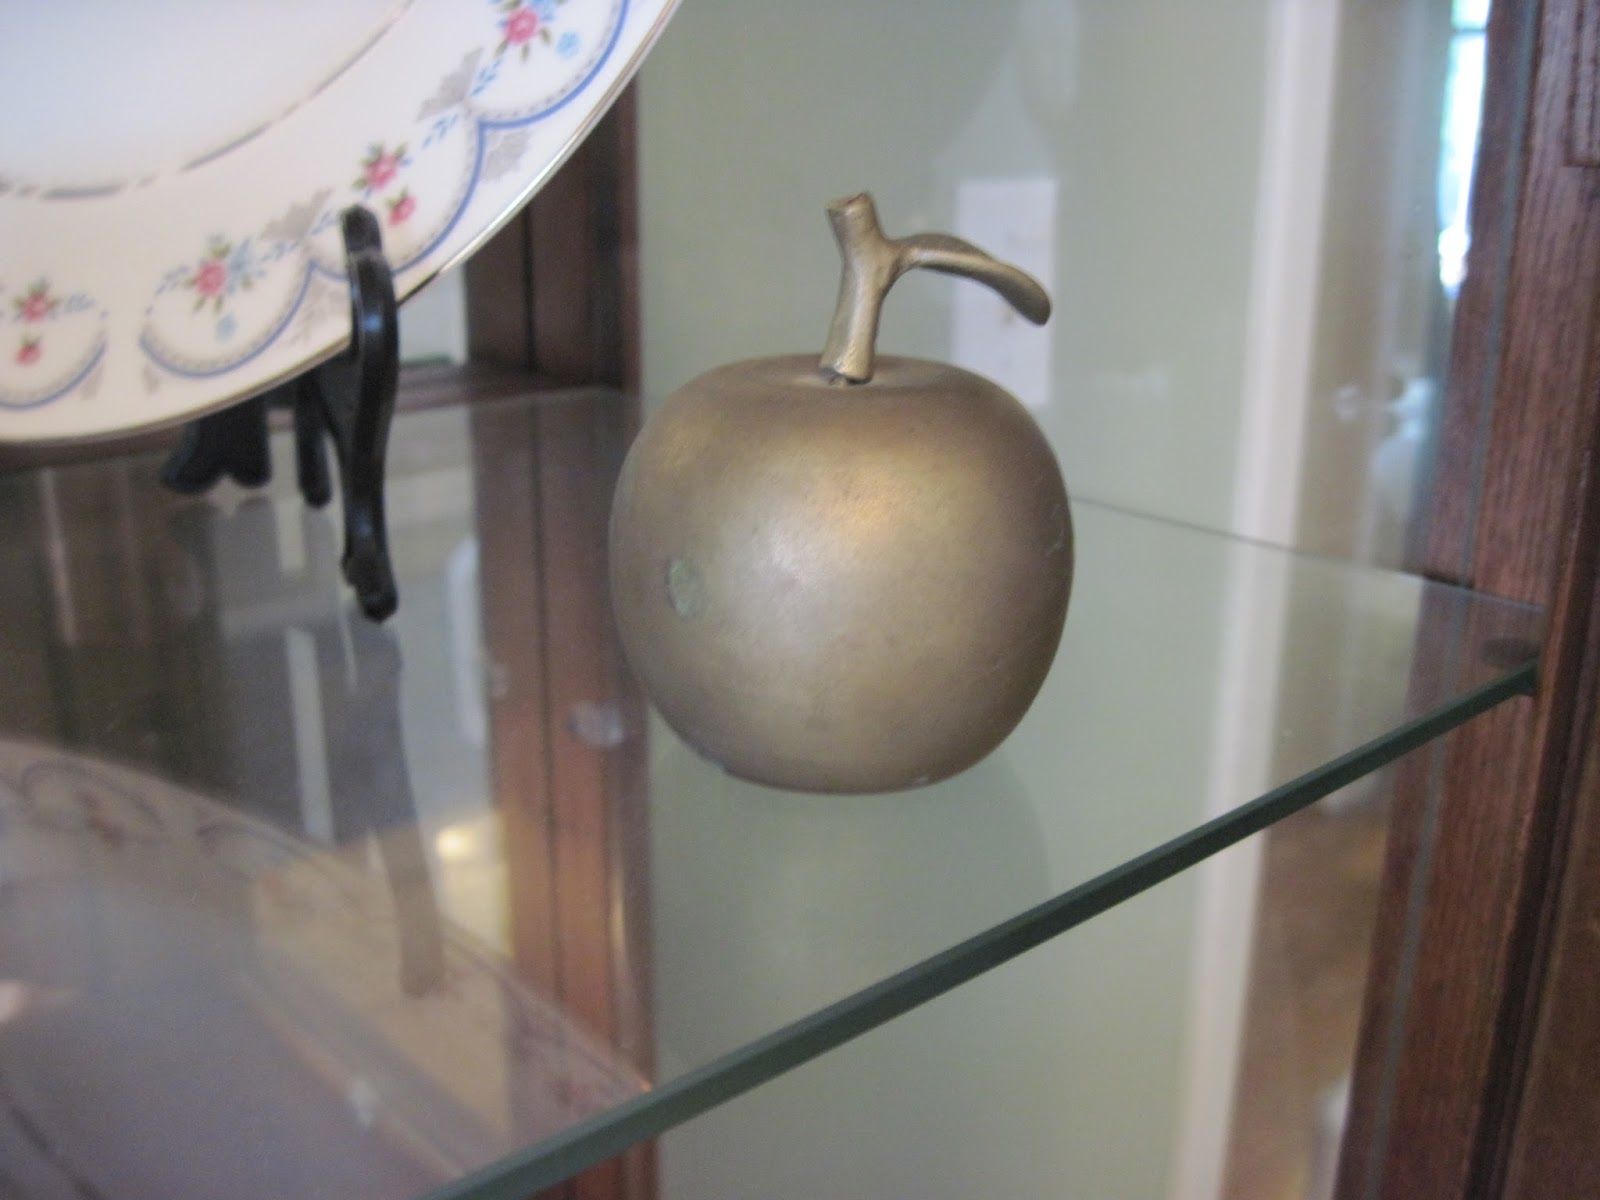
So like everyone else we know, we take our first day of school pictures and gather our materials. But before we start, we always ring the bell. My grandmother's apple bell. I love this bell...it's so pretty! And the crazy kids especially love to ring it rigorously and joyfully! First day of school!


Ring the bell for the first day of school!

We may forget to ring it every day as the school year goes on and we get more and more wrapped up with our work. But you can bet on that first day, that apple bell's a-ringing!

Once the bell has rung, we can't forget to put our first jelly bean into our jelly bean containers. I have to admit, I always do forget, but as I said in a previous post, the two Crazy Kids love this countdown to the Hundredth day of school and never miss a day!

Jelly bean #1!!!

Then we ease into our planned activities and school work. Sometimes this involves learning new procedures or schedules for the year. I try to start with anything that's going to be with us all year as soon as possible. This year, I'm hoping CLB will learn to ask for help with his writing when he needs it instead of simply waiting for me to step in and give suggestions. So right away, we went over the new schedule for writing, and I'll keep it up on the white board until he's comfortable with it or until I need to make changes to it to help support him more.


If this doesn't work, and CLB doesn't ask for help, then I'll make sure to change it up!

Once all the paper and pencil (and markers, paint, shaving cream, etc.) work is completed, we have a little fun! We always go out to eat for lunch, and I usually let the Crazy Kids pick where they want to go. This year, I didn't even bother asking where they wanted to eat, because every time I do ask, it's always "MCDONALD'S!!!". We try not to go too often, so going on the first day of school was a special treat! While we were there, we also worked on a scavenger hunt for CLG. She was supposed to look around to find circles while we were out and about and find circles she did! 

My chocolate milk cap, Mooom!

While we eat, I always check in with the Crazy Kids and see how the first day went. There have been times when CLB has felt completely overwhelmed on the first day and others where he is left wondering if that was all we'd be doing for the day, because it surely didn't feel like much! I'm happy to report that it seems as if we reached a happy medium this year. Over lunch, we also talk about our first service project for the year and how we can accomplish it. This year, we had already decided to do Operation Christmas Child and thought it would be a great idea to head over to the local Target to pick up items for our shoe box with the money the Crazy Kids have been saving. I like starting the year speaking to the Crazy Kids about how they can help other people in our community and across the world. I feel it's important for them to realize that not everything revolves around their little Crazy selves and although they might be little, a little bit of something can make a big difference and is definitely better than nothing!!


Some of our donation picks for Operation Christmas Child. Yup, more pictures for the circle scavenger hunt!

You can fit a lot in a shoebox! And lookie there, I was able to buy some school supplies this year. Ahhh, my zen moment!

This really was a big day for the Crazy Kids, and they enjoyed themselves and I enjoyed them! But before we finished up for the day, we all thought there was one more thing we should do to celebrate a successful first day of school:

ICE CREAM!!

I think this is going to be a new treat we add to our list of things to do on the first day of school. Oh, and look at that:

Nom!
Another circle! Whoda thunk!?!


Saturday, August 17, 2013

Last Big Bit of Summer Fun!

Just a short blurb from me today. I'm tired, beat and worn out! A great way to be when our homeschool year starts in just a few days, right!?! Well, I have a good reason for being worn out...we went to the beach yesterday. And not just any beach! A beach with an old fashioned amusement park!


This little piece of kiddie heaven is only about 45 minutes away from us, but (and I cringe to admit it) we haven't been there once in all the times we've lived here! The reason? I'm a super nervous Nellie when it comes to driving too far from home! Fortunately, I have a fantastically wonderful friend who completely understands this, and she told me that we have to go, so we're going, no ifs, ands, ors or buts! Sometimes that's just what I need to beat the anxiety...a good kick in the pants! 

So we went, and I drove and my fantastically wonderful friend just kept being more and more fantastically wonderful while she looked after her child and helped me with the Crazy Kids! Seriously, I cannot believe how much fun it is going to an amusement park/beach with a kind hearted mom. Other moms are telepathic and just know when you need help with your crazy kids! Anyway, we had a great time, the kids had a great time, and I conquered my fear of driving to this place, so we will be going again and again! And it was a fantastic way to end our summer season. But now, I'm tired, beat and worn out (in a happy way), and, oh yeah, I have a bit of a mess to clean up before school starts!


Guess who forgot to take off her little pink crocs when we got back from the beach!

Wednesday, August 14, 2013

Fun Touches for the School Room!

So in less than one short week we'll be starting up with our new homeschool year. We're all very excited! The school room is cleaned up and looking great, lesson plans have been put together, and we are ready!

This year for the school room bulletin board, we decided to have a wise old owl theme. I found a cute little roll of owl ribbon, and thought strips of that around the board would look lovely.

So cute!

I wanted an olive green background, but the two Crazy Kids were adamant we have brown. Since it's their room, too, who am I to argue! And, turns out, I think the brown looks much better than the olive would have! I just bought a yard of cloth from JoAnn Fabrics (our JoAnn's allows multiple coupons on one purchase, so, for us, it's the place to go!), cut it to fit the board and stapled it up there. Then I cut strips of ribbon to go over the border of the board because heaven knows I cannot cut fabric in a straight line! The ribbon hides the crookedness beautifully! I stapled them up, too, and voila! decorated bulletin board!

Hmmm, maybe I should have ironed the cloth. And would you look at that! Crooked ribbon. I'm hopeless with straight lines!

We also decided to start the year off with the Book Tree again. I did this with the kids last year, and apparently, it was a huge hit. I cut out an outline of a tree and used double sided "removable" tape to stick it to the school room door. I put the word "removable" in quotes because, later in the year, when I tried to remove it, it didn't remove. It took about an hour to scrape everything off the door! This year, I'm laminating the entire thing!

I know, it looks like something from another planet, but the tree actually looks fantastic once the leaves and apples get put on there!

Once school started, every time we read a book, we wrote the title and author's name on a leaf or apple and taped it to our tree.

These look wonderful on our tree!

The tree does tend to get overgrown after a bit, since we read so many books. Last year, once that started happening, I planned on taking it down and being done with it. But the Crazy Kids loved it so much, they asked me to continue with the idea. So for each season or holiday, we made another display for our book titles. It was lots of fun to see the displays grow, so we'll be doing it again this year!

Our Spring book display from last year. The Crazy Kids loved watching the flower bloom!

And finally, our school room would not be complete without our Hundred Day Jelly Bean Jars!

Yum!
I actually keep waiting for the Crazy Kids to be sick of this activity, but still, after three years, they look forward to it! Every day, we put in one jelly bean to mark the time. On our Hundredth Day, we put the last jelly bean in and have a little party. Of course they get to eat jelly beans, but not the ones that have gotten all sticky and stuck together in the jars...we do a craft of some sort with those. But it's a fun way for them to start their school day and seeing the jar every day reminds them of how much they've accomplished and the fun party they'll be having soon.

I love our little school room and, although I am not a terribly good decorator (not at all, actually), it is fun to do these little touches for the kids. It really gets them geared up for another fun homeschool year. What do you do to get your school room or space prepared? I'd love suggestions!!